At home or traveling, such an organizer is useful everywhere. It does not take up much space, it is very convenient to use, hanging with the help of the most ordinary hangers.
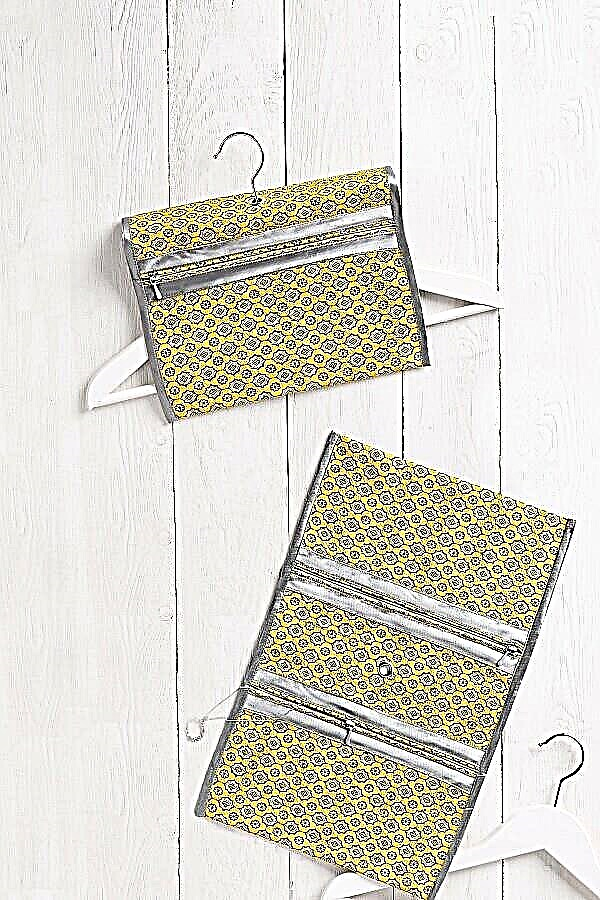
In the hanging organizer you can store and transport jewelry, cosmetics, bath accessories, absolutely everything that you may need.
You will need:

✂ cotton fabric (approx. 100 x 40 cm);
✂ adhesive gasket Decovil (Freudenberg);
✂ oblique trim approx. 1.20 m wide by 1.5 cm and approx. 1 m wide 2.5 cm;
✂ 2 zippers 25 cm long;
✂ thread for sewing;
✂ tailor pins;
✂ manual needle for sewing;
✂ ruler for patchwork;
✂ scale ruler;
✂ centimeter tape;
✂ chalk pencil;
✂ block with a diameter of 11 mm;
✂ scissors;
✂ hammer
DIY clothing pouch
Step 1. Cut out the details

A size of 76 x 28 cm;
In size 16 x 28 cm.
From Decovil - a piece measuring 4 x 28 cm.
All parts include allowances 1.5 cm wide.
Step 2

In part B, overlay longitudinal sections on the overlock, and iron Decovil on the wrong side of the part from the wrong side.
Step 3

Align Decovil on both sides with a thread of contrasting color to sew counting stitches.
Step 4

At the part A, cross the cross sections to overcast on the overlock and iron on the wrong side by 1.5 cm. Pull the zipper along these sides.
How to make a hoop organizer
Step 5

Stitch front zipper to edge.
Step 6

To decorate along the zipper on both sides, sew an oblique inlay 1.5 cm wide on the edge.
Step 7

Short sections of part B are ironed to the wrong side by 1.5 cm and sewn in with a zipper.
Step 8

On both sides again sew up an oblique inlay to the edge.
Step 9

Lay the resulting part with attached zippers (ring) on the table so that the depth of each pocket is 15 cm, chop and lay the lines according to the markup (see step 3) through two layers of fabric.
Step 10

Iron all layers. The edges on both long sides are chopped with the wrong side to the wrong side.
DIY DIY organizer
Step 11

Align both long sides with 5 mm stitches. Pockets ready.
Step 12

Fold the oblique 2.5 cm wide along in half, iron and pin it, edging both long sides.
Step 13

To sew a slanting inlay to the edge on both sides.
Step 14

For clean processing, sew each corner manually.
Step 15

In the middle, in the area duplicated by the gasket, put a label for the block, carefully cut through and install the block.

Done!